Tour Viewer
This quick introduction will help you to use Ogulo quickly and efficiently. We recommend that you carry out the steps explained here simultaneously using your own Ogulo access, in order to ensure that you have understood everything fully.
The Tour Viewer shows you the tour as a visitor will see it later on.
You can see the Tour Viewer if you click on “360° Tours” in the left tab and then on the Play symbol (View Tour) for the respective tour.

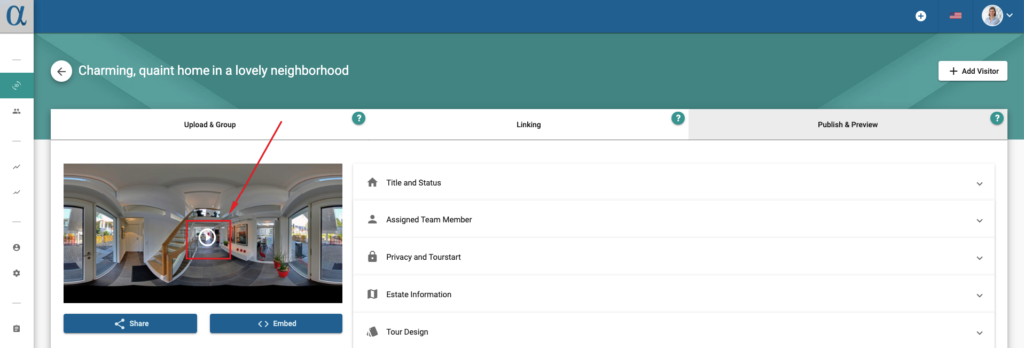
If you are still editing your tour, click on the Play symbol in the tour preview on the left side of the screen under “Publish & Preview”.
Welcome screen
Once the visitor has clicked on “View tour”, a welcome screen appears. This displays the contact person you have chosen, along with their contact details. The visitor will also find a short overview of how to navigate through the tour.

Navigating inside the 360° VR tour
When the visitor is in the tour, they have two options to change the perspective:
- They can click and hold the left mouse button and drag left/right, up/down in the image to reach the desired viewing angle.
- They can use the 4 arrow buttons on the keyboard to change the viewing angle.

The visitor enters a new room when they click on one of the hotspots.
Access to the 360° VR tour
When creating your tour, you had the opportunity to set the access rights.
1) Not public
If your tour is not public, visitors will be required to enter their personal details if they want to enter a private area of the tour.

Once a visitor has entered their contact details, the contact person for this tour will receive an email with the visitor’s contact details. If you have chosen email authentication for the access rights, the visitor will obtain access to the virtual tour once they have entered their contact details. If you have chosen manual authentication, the contact person must grant access manually first.
2) Public
If you have decided to make the tour public, all visitors can move around freely the tour.
Overview of Tour Viewer
The visitor can now see a tab on the left of the Tour Viewer window, which provides more information about the tour.
Contact details
If the visitor clicks on the saved contact person’s photo on the top left of the screen, a window opens which displays the contact person’s details and company information to the visitor.

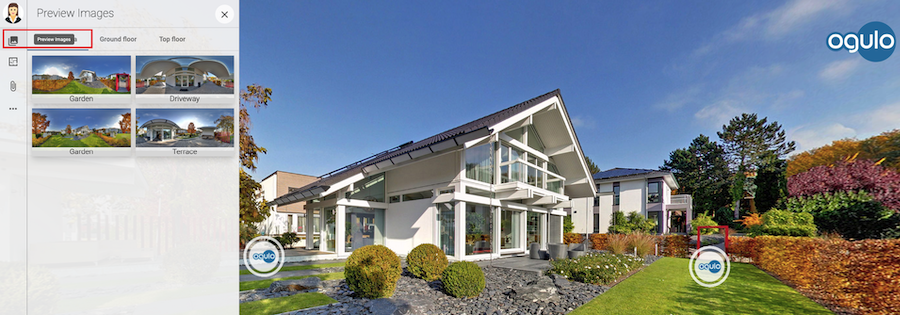
Preview images
If the visitor clicks on the second icon (“Preview Images”), a window opens with all the publicly accessible preview images of the property. They are arranged by floor. Clicking on an image takes the visitor to the corresponding room.
Floor plan
The next menu option (“Floor Plan”) displays the floor plan to the visitor, including the hotspots that you have placed in the property. When visitors click on one of these hotspots, they are immediately brought to the corresponding room within the tour.
The floor plans are also arranged by floor.

Property details and map
The next option allows visitors to see the property address on a map and also links them to the saved property exposé.

Menu
When the visitor clicks on the last option (“Menu”) in the tab, various features of the tour are displayed. Visitors have the following options here:
- Register
- Share the tour
- View the tour in VR mode
- Take measurements using the virtual Measurement Tool
- Select the tour language (English or German)
- Set the unit of measurement
- Activate fullscreen mode
- Activate auto-rotation
- Activate gyroscope (info: this is only required when using the tool on a cellphone)
- Activate music (if you have added any)
Next article: Ogulo Quick Introduction: Step 5, Visitors
Previous article: Ogulo Quick Introduction: Step 3, Previewing & publishing your 360° virtual tour