The content of the video is in text form below:
Uploading panoramic images and grouping them into floors
This quick introduction will help you to use Ogulo quickly and efficiently. We recommend that you carry out the steps explained here simultaneously using your own Ogulo access and panoramic images, in order to ensure that you have understood everything fully.
To create your first virtual 360° tour, all you need is a few panoramic pictures of your current properties and the matching floor plan (if available).
The first step is to upload your panoramic pictures and assign them to a floor. This is done as follows:
Create new virtual tour
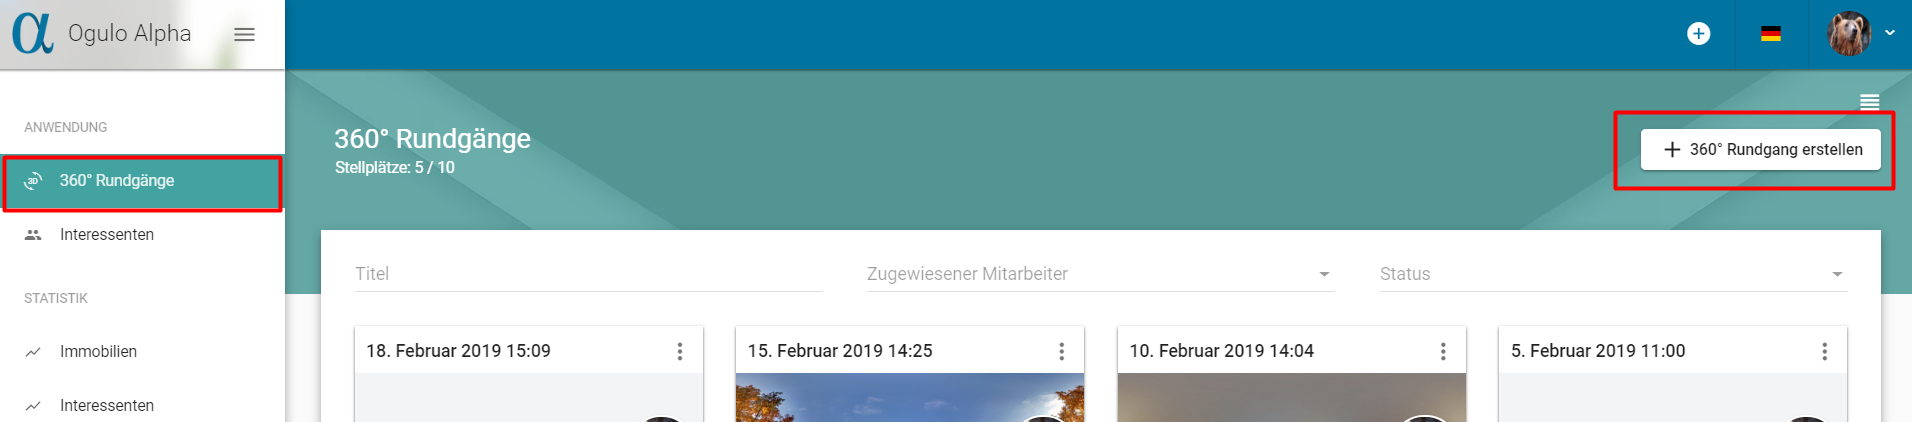
If you are not on your home screen, click on “360° virtual tours”, the first item in the menu on the left. You will then see in the middle of the screen under “360° virtual tours” an overview of your spaces, how many are being used and how many are still free. Then click on “+ Add 360° virtual tour” on the top right.
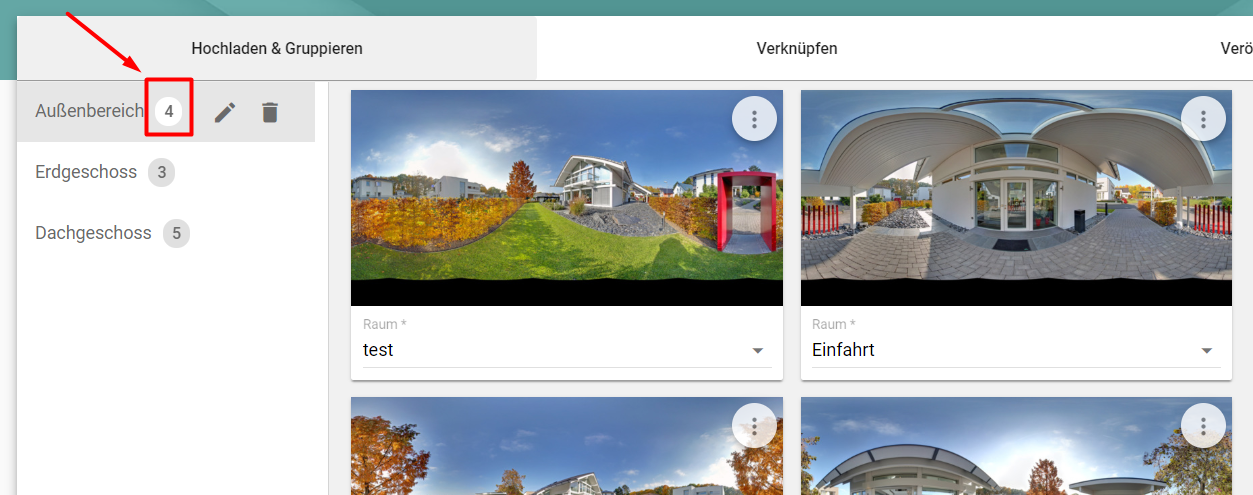
You have now come to “Uploading & Grouping”, the first step in creating your virtual tour. Here you have the option of adding a floor, panoramic images, and a floor plan.
Add floor
- Click on the “+ Add floor” button at the bottom left of the screen. A window opens where you have the option of naming the first floor of your virtual tour.
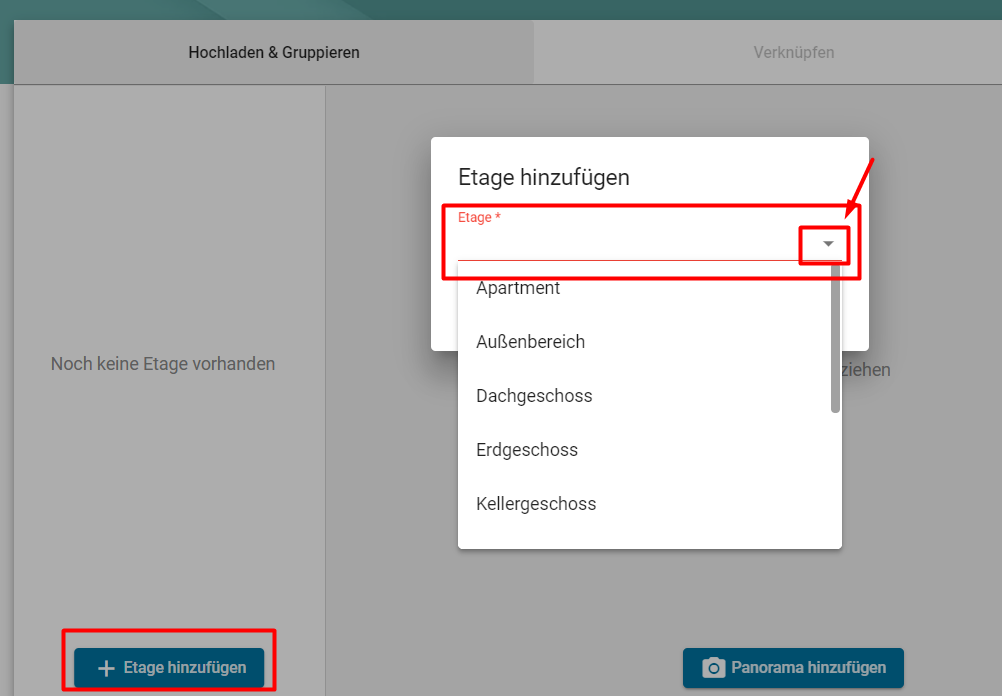
2. Now click on the arrow to open a drop-down menu that offers you various options for naming your first floor. If none of these options is appropriate, you can also enter a custom floor name in the field.
Once you have selected a floor name or entered a custom floor name, click on “Save”.
Repeat this process for all the floors in your 360° virtual tour.
Add panoramic images
- Click on the “Add Panorama Image” button in the middle of the screen. A window opens where you get the chance to select a panoramic picture from your computer. Select all the pictures of your property and click on “Open”.

The pictures are now uploaded.
2. To name your panoramic pictures, click on the small arrow beneath and to the right of the panoramic picture you want to rename. Just like with the floor names, some room names are suggested to you in the drop-down menu.
If the right label is not there, you can also give your panoramic pictures a custom name. To do this, simply enter the custom name into the input field.
Repeat this process until you have uploaded and named all the panoramic pictures in the virtual tour.
Group rooms
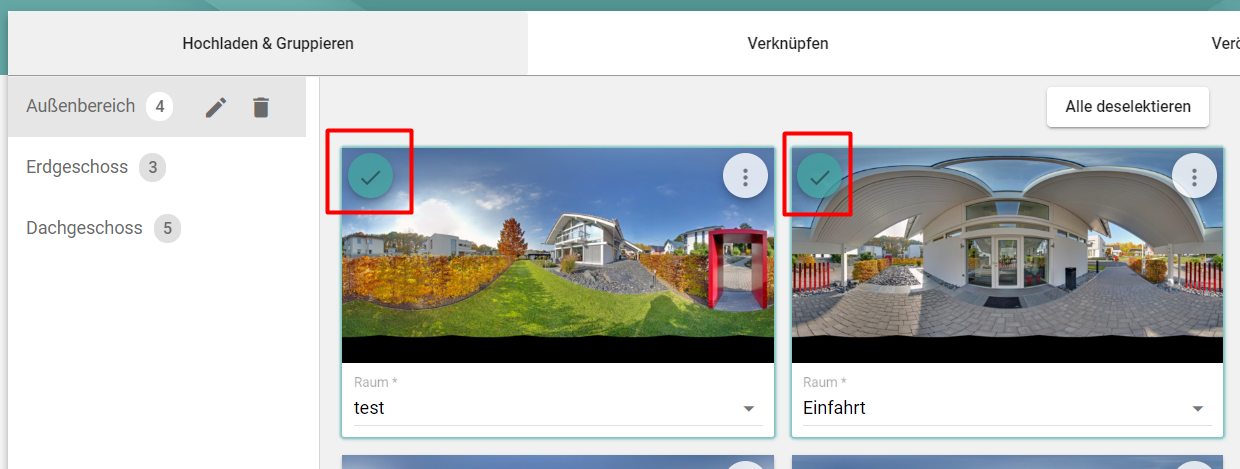
Now group together the panoramic pictures that are on the same floor of the property. To do this, mark them by clicking on the respective picture. When a picture is marked, a green checkmark appears in the top left corner of the picture.
Assign rooms to a floor
Now click on one of the marked panoramic pictures. Click and hold the mouse button and drag this picture to left on to the list of the different floors. Release the mouse button over the name of the floor where the marked pictures are located.
Because you have grouped all the pictures together beforehand, all the marked pictures are now in the selected floor. The left column now shows you how many pictures are in each floor.
Repeat this process until all the panoramic pictures are in their respective floor.
Add floor plan
- Click on “Add Floorplan Image” at the bottom right of the screen. A window opens where you get the chance to select a floor plan. Select a floor plan and click on “Open”.
- Repeat this step for every floor.
Do you not have a floor plan for your 360° virtual tour? No problem – we can create a floor plan for you. Contact us at info@ogulo.com for more details!
Next article: Ogulo Quick Introduction: Step 2, linking panoramic images to each other