The content of the video is in text form below:
Previewing & publishing your 360° virtual tour
This quick introduction will help you to use Ogulo quickly and efficiently. We recommend that you carry out the steps explained here simultaneously using your own Ogulo access and panoramic images, in order to ensure that you have understood everything fully.
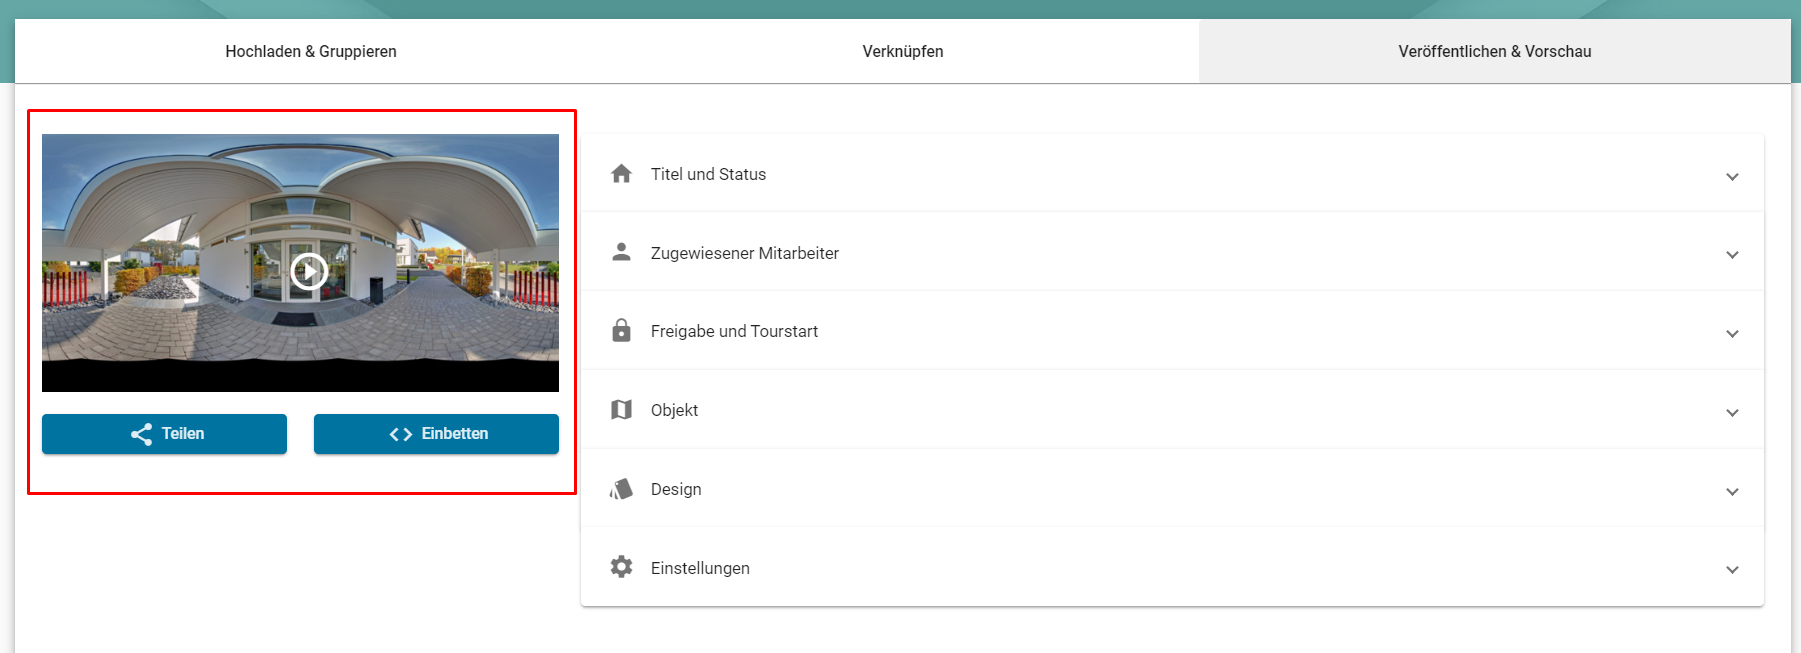
When creating your virtual tour, click on Step 3 “Publish & Preview”.
Now you can see a preview picture of your virtual tour on the left with the two buttons “Share” and “Embed”. To the right of that is the menu, where you can change the settings for your virtual tour. In this article you will find out how that works and how you can publish your virtual tour.
Title and Status
The first item in the settings menu for your tour is “Title and Status”. Click on it to enter the name of your virtual tour under “Headline”. We recommend that you choose an appealing and informative name for your virtual tour (e.g. “Light-flooded single family house near the Rhine in Cologne”).
To the right under the title you can see a slide control. Here you can switch the virtual tour to active. The virtual tour is active once the switch is pushed to the right and has turned Ogulo green.
Please note that you have to activate the virtual tour first in order to get a preview of the virtual tour and to share your tour.

Assigned Team Member
In the next settings item, “Assigned Team Member”, you have the option of assigning this virtual tour to one of your team members. The assigned employee is then the declared point of contact in the tour, has access to this virtual tour, and can share it with their network.
To do this, click on your name and select the realtor from your team who is responsible for this property. The team member who created the tour (i.e. you) is set as the assigned team member by default.
Privacy & Tour Start
Under “Privacy & Tour Start” you can set the access rights for your virtual tour. You have the choice between three options:
- Public: All the rooms are public and anyone interested can visit the virtual tour.
- Email Authentication: After a prospective customer has entered their email address, they automatically receive an activation link and can take the virtual tour using this link. You receive the prospective customer’s details and can view their visitor behavior using the analytics function.
- Manual Authentication: Once a prospective customer has entered their email, you as the assigned team member receive an email with the prospective customer’s requested contact details. Once you have seen these details, you can decide whether to activate the virtual tour for this prospective customer.

We recommend that you choose the manual authentication, since this gives you complete control over which prospective customer gets access to the virtual tour and you can also see statistics on their visitor behavior.
Under the Statistics tab you can display the visitor statistics by your properties and your visitors. However, you only get analytics if you have chosen either “Email Authentication” or “Manual Authentication” as the privacy option for your virtual tours. This means a prospective customer has to register for the virtual tour first or you have to grant them access manually to gain access to the statistics.
Now select your preferred privacy setting.
If you choose either “Email Authentication” or “Manual Authentication”, click on the little pencil on the top right of the respective window to choose public viewpoints and the start of the tour.
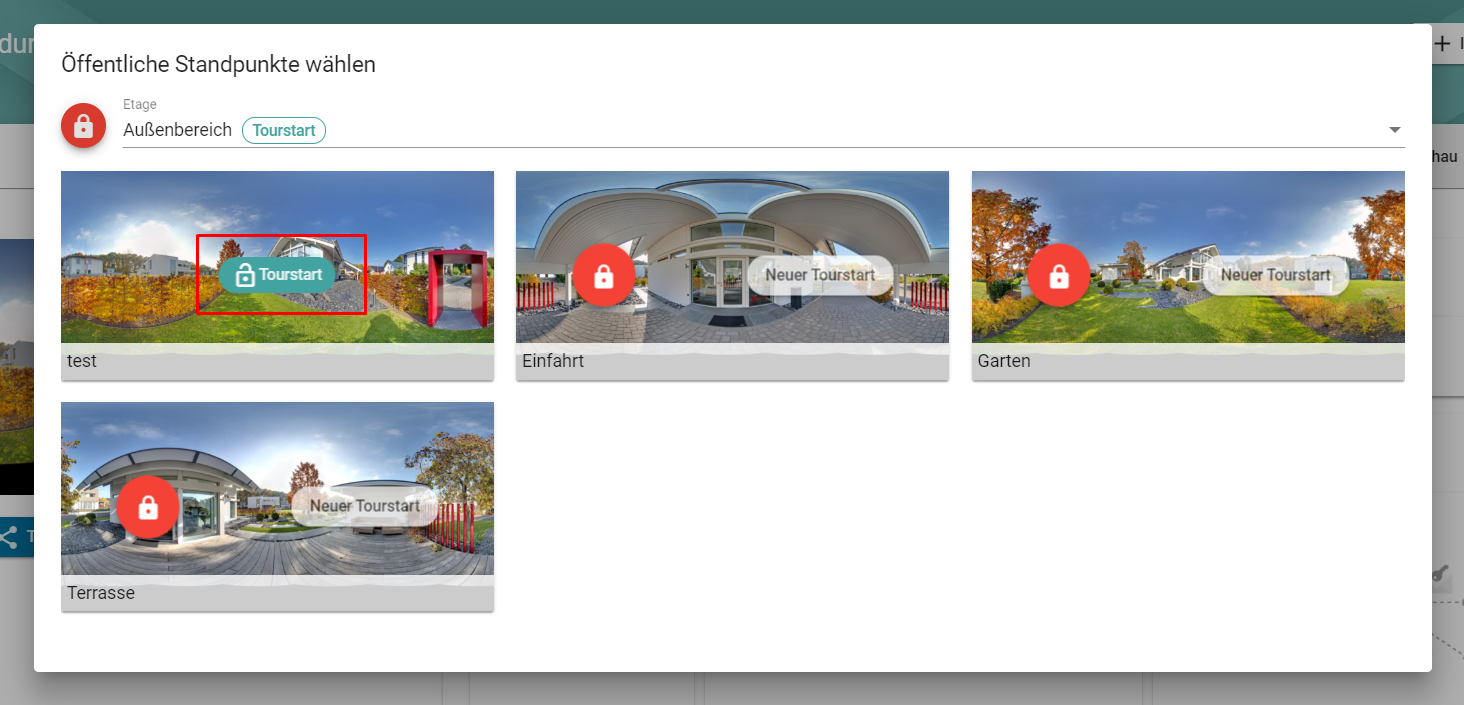
In the window that opens you can now see which floor you are on. The panoramic pictures for this floor are listed underneath. The pictures that have a red, closed lock are private and cannot be viewed by the public. To change this, just click on the lock. It then changes into a green, open lock and this then makes the room open to the public for viewing.
Repeat this step for all rooms on all floors.
You also have the option of setting a whole floor to public or private at once. To do this, just click on the lock left of the floor name in the open window.
To change the tour start, select the preferred floor where the virtual tour is supposed to start from the above menu. There is now a “New Tourstart” button in the panoramic picture that you want to have as your tour start. Click on this button to set the picture as the tour start.
Estate Information
In the next item in your virtual tour settings you can upload the URL to your listing if you have one. To do this, paste the URL into the field provided.
Then enter the address of the property under “Address”. Both pieces of information can be found again later in the tour.
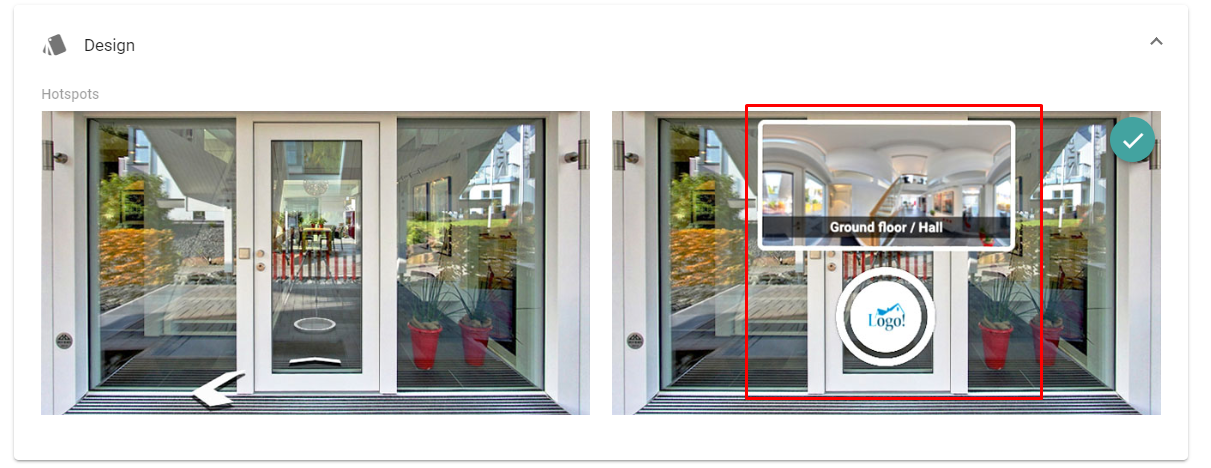
Tour Design
You can select your preferred hotspot design under “Tour Design”. Here you have the option of choosing between either a virtual tour view without your logo and with arrows and a virtual tour view with your logo and preview images.
We recommend that you choose the option with your logo and the preview images, since you will improve your brand awareness by displaying your logo.
Tour Settings
Under Tour Settings you have the option of switching on the measurement tool. If this is switched on (slide on the right and blue), the visitor in the tour is able to make measurements within the property.
You can also enter the height of the nodal point here. If you made your virtual tour with the monopod provided by us and the Ricoh Theta V, the height of the nodal point is approximately 5 feet 3.6 inches.
Other settings for your virtual tour, such as displaying your logo, full screen, autorotation, and your choice of background music can also be changed here.
Virtual Tour Preview
To the left of the settings menu you will find the preview of your virtual tour. Click on the arrow in the middle of the screen to view your virtual tour.
Share and Embed Virtual Tour
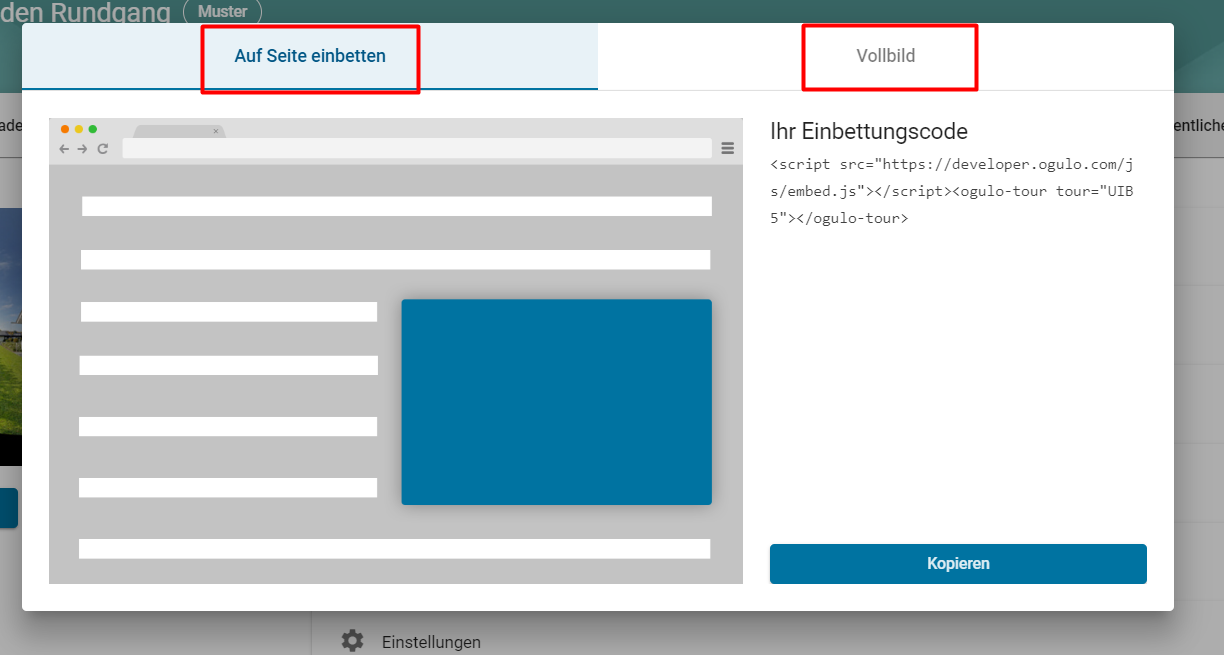
Under the preview of your virtual tour you will find two buttons: “Share” and “Embed”. Clicking on “Share” gives you the option to share your virtual tour via email, Whatsapp, social media, by copying the URL, or directly by adding prospective customers.
Clicking on “Embed” gives you the choice of embedding the virtual tour either in an existing page or in full screen. To do this, copy the relevant embed code and paste it into the backend of your website (e.g. WordPress).
Next article: Ogulo Quick Introduction: Step 4, tour viewer
Previous article: Ogulo Quick Introduction: Step 2, linking panoramic images to each other